Your laptop’s sudden refusal to see your monitor is a common and deeply frustrating problem. The screen stays black, the settings show nothing, and you are left wondering what went wrong. It feels like a major failure, but in the vast majority of cases, it is not.
This issue almost always stems from a simple breakdown in a complex but understandable chain. This chain links your laptop’s internal graphics hardware through a physical port and cable to your monitor’s own electronics. A problem with any single link, or with the software that manages it all, can stop detection cold.
This guide is built to act as your personal technician. We will walk through a clear, systematic process of diagnosis. We start with the fastest checks that solve most problems in under a minute and then move logically to more involved solutions. Our goal is to give you the knowledge to isolate the exact cause and fix it with confidence.
The Immediate Fixes: Solve It in Under a Minute
Before you dive into software settings or suspect broken hardware, always perform these three basic checks. They are simple, often overlooked, and statistics from IT support desks suggest they resolve over half of all “no detection” issues instantly. Think of this as verifying the obvious to save yourself time and stress.
1. Verify Power and Source Selection on Your Monitor
This sounds too basic, but it is the most common oversight. First, ensure your monitor is actually plugged into a working outlet and that its power button is truly on. Look for a power indicator light, usually white, blue, or green.
Next, and this is critical, you must tell the monitor which input port to listen to. If your cable is plugged into the monitor’s HDMI 2 port, but the monitor is set to look for a signal on its DisplayPort 1 port, it will see nothing. Use the physical buttons on your monitor to open its on-screen menu. Navigate to “Input Source,” “Source Select,” or a similar option and choose the exact port name where your cable is connected.
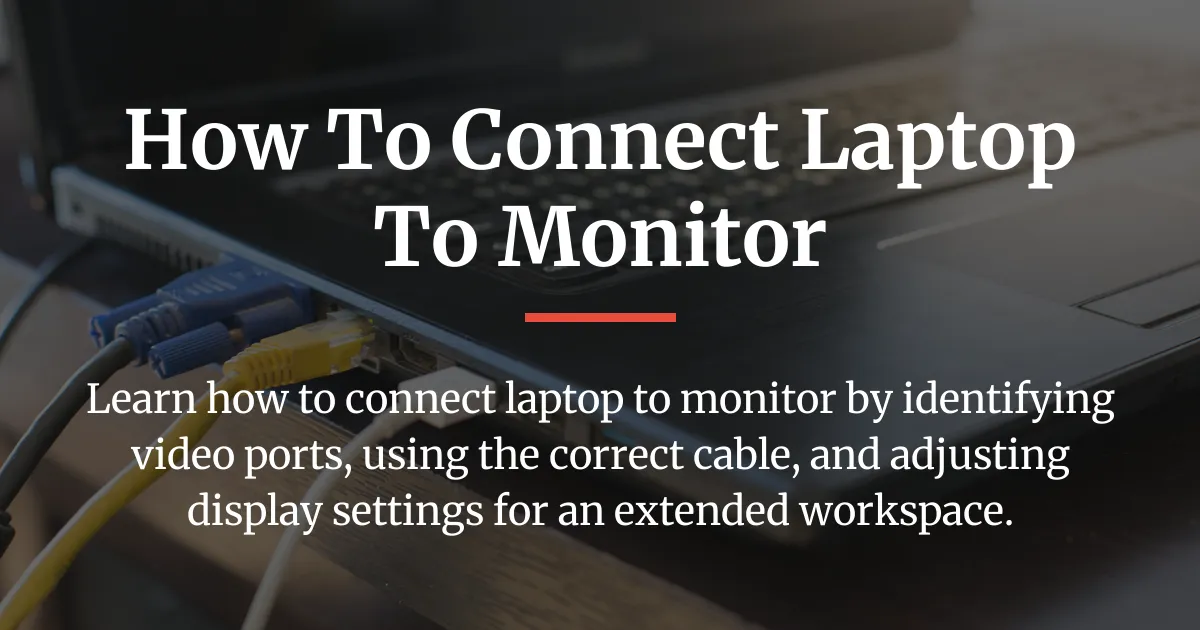
2. Reseat Every Cable Connection Firmly
A loose connection is a dead connection. Do not just glance at the cables. Physically unplug the video cable from both your laptop and your monitor. Inspect the ends for any obvious damage, like bent pins inside an HDMI port or significant debris.
Then, plug each end back in firmly and securely. You should feel or hear a distinct click with cables like DisplayPort or some HDMI variants. For cables that screw in, like VGA or DVI, hand-tighten the screws to ensure a snug fit. A partially inserted cable can carry power but not the complex data signal needed for detection.
3. Press Your Laptop’s Display Toggle Key
Laptops have a built-in keyboard shortcut to control where the screen image is sent. It is meant for quickly connecting to projectors, and it can get stuck in a mode that turns off the external video port. The exact key varies, but it is always one of the “F1” through “F12” keys at the top of your keyboard.
Look for a small icon on one of those keys that resembles a monitor or two screens, often next to icons like a speaker or sun. It is commonly on F4, F5, F7, or F8. To use it, you must hold down the “Fn” (Function) key, usually near the bottom-left of the keyboard, and then press the corresponding monitor key once. Press the combination a few times to cycle through the modes: Laptop Screen Only, Duplicate, Extend, and Second Screen Only.
As a software alternative, you can press the “Windows Key” and the “P” key at the same time. A menu will pop up on your laptop screen with the same four options. Select “Duplicate” or “Extend” to try to trigger detection.
How Your Hardware Connection Chain Really Works (And Where It Breaks)
If the quick fixes did not work, the problem lies deeper in the hardware signal chain. Understanding this path is key to diagnosing where the failure is happening. The visual signal must travel a physical road from its creation point to its destination.
The journey starts inside your laptop at the Graphics Processing Unit, or GPU. This chip creates the images. It sends that image data out through a specific physical port on your laptop’s side, like an HDMI or USB-C port. The data travels along the cable you have plugged in. It arrives at the corresponding port on the back of your monitor. Finally, the monitor’s own internal logic board receives the signal and instructs the screen panel to light up.
A failure at any one of these points will break the entire chain. Your job is to test each link methodically using substitution, which means swapping parts with known-good alternatives when possible.
Inspecting Ports and Testing with Another Monitor
Begin with the ports themselves. With the laptop and monitor powered off, shine a light into the video port on your laptop. Look for any obstructions, like pocket lint packed into a USB-C port, or for physical damage, such as bent or missing metal pins inside an HDMI or VGA port. A single bent pin is enough to ruin the connection.
The most powerful test is to try your laptop with a different monitor, television, or projector that you know works. Use the same cable if you can. If your laptop detects this second display perfectly, the problem is almost certainly with your original monitor or its specific settings. If it still fails to detect any external display, the issue likely resides in your laptop’s port, cable, or software.
The Critical Role of Cable Quality and Version
Cables are not all the same, and they can fail. A cable might work for powering a device but lose its ability to carry high-speed video data. The first test is to try a different video cable of the same type, preferably a high-quality, short cable you know works.
Beyond simple failure, there is also the issue of version compatibility, especially with HDMI and DisplayPort. An older HDMI cable might not support the resolution or refresh rate your laptop is trying to send. If you are connecting a very new, high-resolution monitor with an old, cheap cable, the handshake between devices can fail, preventing detection. When possible, use cables certified for the latest standards, like HDMI 2.1 or DisplayPort 1.4, as they are designed to be backward compatible and more reliable.
Adapters and Docking Stations: An Extra Link to Test
If you are using an adapter, such as USB-C to HDMI, or a full docking station, you have introduced another complex link into the chain. These devices actively convert the signal from one format to another, and that process can fail.
The best test is to remove the adapter or dock from the equation. Try to connect your laptop directly to the monitor using a native cable, if your laptop has a matching port. If the direct connection works, the fault lies with the adapter or dock. Ensure these devices have any necessary power connected, and check the manufacturer’s website for updated firmware, which is specialized software for the device itself.
Navigating Windows Display Settings and Driver Conflicts
When hardware checks pass, the problem almost always moves into the realm of software. Your operating system, Windows, is the conductor managing the communication between your laptop’s brain and its display outputs. Sometimes, the conductor gets confused or the specialized translators, called drivers, become corrupted.
Forcing Detection in Windows Display Settings
Windows has a dedicated center for managing screens. To access it, right-click on any empty space on your laptop’s desktop and select “Display settings.” On the page that opens, scroll down to the section labeled “Multiple displays.” Here, click the blue button that says “Detect.”
This sends a deliberate signal from Windows to probe the video ports actively. If your monitor is powered on and correctly connected, this can sometimes jolt the system into recognition. Just below the detect button, you will see a drop-down menu for “Multiple displays.” If it says “Show only on 1,” change it to “Duplicate these displays” or “Extend these displays.” This action can also force Windows to look for and enable the second screen.
Performing a Clean Display Driver Reinstallation
The display driver is the most important piece of software in this puzzle. It is the precise translator that allows Windows to give commands to your specific graphics hardware, whether it is from Intel, AMD, or NVIDIA. After a Windows update or a random software glitch, this driver file can become corrupted.
Simply updating may not fix a corrupted file. Instead, we perform a clean reinstall. First, right-click the Windows Start button and choose “Device Manager.” In the window that opens, find and click the arrow next to “Display adapters.” You will see one or two items listed, like “Intel UHD Graphics” or “NVIDIA GeForce.”
Right-click on the display adapter and select “Uninstall device.” A critical warning box will appear. You must check the box that says “Attempt to remove the driver software for this device.” Then, click “Uninstall.” Your screen may flash or go to a low resolution. This is normal. Once done, restart your laptop. Upon restart, Windows will automatically detect the missing graphics hardware and reinstall a fresh, default driver. This clean slate often resolves deep-seated detection issues.
Updating Drivers from the Manufacturer
After the clean reinstall, or if you want to try it first, you can seek the latest driver from the source. For NVIDIA or AMD graphics, visit the respective company’s website and use their driver detection tool. For Intel graphics or laptops with integrated graphics only, visit your laptop manufacturer’s support website, such as Dell, HP, or Lenovo.
Enter your laptop’s exact model number and download the latest display or chipset driver listed for your version of Windows. Installing the manufacturer’s driver can provide better stability and features than the generic one Windows installs on its own.
The Hidden Culprit: Power Management and Graphics Control Panels
Windows has power-saving features that can interfere. In Device Manager, right-click your display adapter again and choose “Properties.” Go to the “Power Management” tab. You will see an option that says, “Allow the computer to turn off this device to save power.” Uncheck this box and click “OK.” This prevents Windows from mistakenly putting your video port to sleep when it should be active.
Furthermore, if you have an NVIDIA or AMD GPU, they come with advanced control panels. These are separate from Windows settings. Right-click your desktop and look for “NVIDIA Control Panel” or “AMD Software.” Inside these applications, there are sections for “Set up multiple displays” or “Display.” These panels can sometimes disable a display manually. Use them to look for a detection option or to reset the display configuration to default, which can clear any incorrect profiles blocking detection.
Your Systematic Troubleshooting Action Plan
By now, you understand the individual pieces. This section combines them into a single, logical, and professional action plan. Follow these steps in order. Do not skip ahead. The process is designed to move from the most external and simple components to the most internal and complex software fixes.
Step 1: The Foundation Check. Complete every action in “The Immediate Fixes” section. Confirm monitor power, select the right input source, reseat all cables at both ends, and use the Fn + monitor key or Windows + P shortcut. This solves the majority of problems instantly.
Step 2: Isolate the Hardware Failure. Follow the logic in “How Your Hardware Connection Chain Really Works.” Test with a different, known-good cable. Test your laptop on a different monitor or TV. Test your monitor with a different laptop or gaming console. This step will conclusively tell you if the problem is with your laptop’s port, the cable, or the monitor itself.
Step 3: Reset the Software Layer. Execute the procedures in “Navigating Windows Display Settings and Driver Conflicts.” Use the Detect button in Windows Display Settings. Then, perform a clean driver reinstall via Device Manager, ensuring you check the box to remove the driver software. After the restart, return to Windows Display Settings and try detection again.
Step 4: Check for Hidden Software Overrides. Disable the power-saving setting for your display adapter in Device Manager as described. Open your graphics card control panel (NVIDIA/AMD/Intel) and look for any display management options, resetting them to default if possible.
Step 5: System-Wide Solutions. If you have reached this point, the issue is persistent. Ensure Windows is fully updated via Settings > Windows Update. Visit your laptop manufacturer’s support website to check for not just display drivers, but also critical system BIOS or UEFI firmware updates. An update for your laptop’s core system can fix hardware communication bugs. As a last resort, if the problem started after a specific date, you can use System Restore to roll your laptop’s software back to a point when the monitor was working.
Brand-Specific Quirks and Multiple Monitor Scenarios
Different laptop manufacturers sometimes add their own slight twists to the standard process. Knowing these can save you time. Furthermore, adding a second or third monitor introduces new layers of complexity that a single monitor does not have.
Common Display Toggle Keys by Brand
While the Fn key combination is standard, the specific function key used varies. Here is a quick reference for some of the most common brands:
| Laptop Brand | Common Function Key | Important Notes |
|---|---|---|
| Dell | F8 | Very consistent across most models. |
| HP | F4 or F2 | Some business models use a key with a dedicated monitor icon. |
| Lenovo (ThinkPad) | F7 | Classic ThinkPads use F7. Some newer models may use F10. |
| ASUS | F8 or F5 | Often depicted with a screen icon next to the key label. |
| Acer | F5 | Look for the monitor/screen icon on the key itself. |
Why Multiple Monitors Create Unique Problems
If a second monitor works but a third does not, you have likely hit a hardware limit. Most integrated graphics chips, like those from Intel, support a maximum of two active displays at once. This count almost always includes your laptop’s built-in screen. So, for many users, one external monitor works, but connecting a second external monitor is impossible without adding a special graphics card.
Mixing different types of ports can also cause issues. For example, on some laptops, using the HDMI port and the VGA port at the same time may not be supported. The laptop’s graphics system may only be able to power one digital and one analog output simultaneously. Always check your laptop’s official specifications for its multi-display capabilities.
Finally, ensure your graphics hardware can handle the total pixel load. Connecting two 4K monitors might exceed the bandwidth of your GPU or the capabilities of the specific ports, leading one monitor to fail detection under the load.
Frequently Asked Questions About Monitor Detection
My laptop won’t detect via HDMI, but it works with VGA. What does this mean?
This specific pattern is a strong indicator of a hardware problem localized to one port. In many laptops, different video ports are managed by different parts of the graphics system. The VGA port is often handled directly by the older, integrated part of the graphics chip. The HDMI port, especially on gaming laptops, might be wired directly to a more powerful, dedicated NVIDIA or AMD GPU.
If the dedicated GPU has a partial failure or if the HDMI port itself is physically damaged, the HDMI output will die while the VGA output continues to work. It strongly suggests you should have the laptop’s hardware inspected, particularly if it is out of warranty.
Why does my monitor get detected sometimes but not every time I plug it in?
Intermittent detection is a classic sign of a failing cable or a loose port connection. As cables age and are flexed, the tiny wires inside can break. Sometimes they make contact, sometimes they do not. Similarly, a port with a slightly loose solder joint on the laptop’s motherboard will work only when the cable is held at a perfect angle.
To diagnose, carefully note if wiggling the cable at the port changes the behavior. If it does, the fault is almost certainly physical. Replace the cable first. If the problem persists with a new cable, the port on the laptop or monitor is likely the culprit.
Can a Windows update really cause my monitor to stop being detected?
Yes, absolutely. While Windows updates are meant to improve security and stability, they occasionally introduce bugs or install generic drivers that conflict with your specific hardware. The graphics driver is a common victim. An update might overwrite a perfectly stable manufacturer driver with a newer Microsoft version that has an undiscovered bug related to display detection.
This is why the clean driver reinstallation process is so effective. It removes the potentially problematic driver that the update installed and forces a fresh install. Always checking your laptop manufacturer’s website after a major Windows update for new driver releases is a good preventative habit.
I’ve tried everything here. My laptop still won’t detect any monitor. Is it broken?
If you have faithfully followed the complete systematic action plan, including testing with known-good cables and monitors, performing a clean driver reinstall, and updating your BIOS, then a serious internal hardware fault is likely. The graphics processing unit (GPU) itself may have failed, or the circuitry on the motherboard that connects to the video ports may be damaged.
At this stage, the most effective course of action is to seek professional repair. A technician can run specialized diagnostics on the laptop’s hardware components to confirm the failure. Before concluding this, however, double-check that you did not miss a simple step in the “Immediate Fixes” section, as human error is always a possibility.
In summary, the question of why your laptop won’t detect your monitor has many potential answers, but none are beyond understanding. The solution almost always lies in methodically checking each link in the connection chain, from the monitor’s power button to Windows’ deepest driver settings. By moving from simple checks to complex resets, you can almost always find the break in the chain and restore your display, saving time, money, and significant frustration.