Struggling with a screen that’s too dim for late-night reading or too bright for comfortable viewing can disrupt your focus. If you’re wondering how to change brightness on monitor, this guide covers everything from basic adjustments to advanced fixes, tailored for desktops, laptops, and various brands.
Whether you have an external display or an integrated one, we’ll start with the simplest methods and build to solutions for tricky scenarios. By the end, you’ll have full control over your display without frustration.
How to Change Brightness on Monitor
For most standalone monitors, adjusting the brightness happens directly on the device itself through its built-in controls. This approach works because monitors handle their own display settings independently of your computer.
To get started, identify the control buttons, which are usually small and located along the bottom or side edge of the bezel. Press the power or menu button to wake them up if the screen is off.
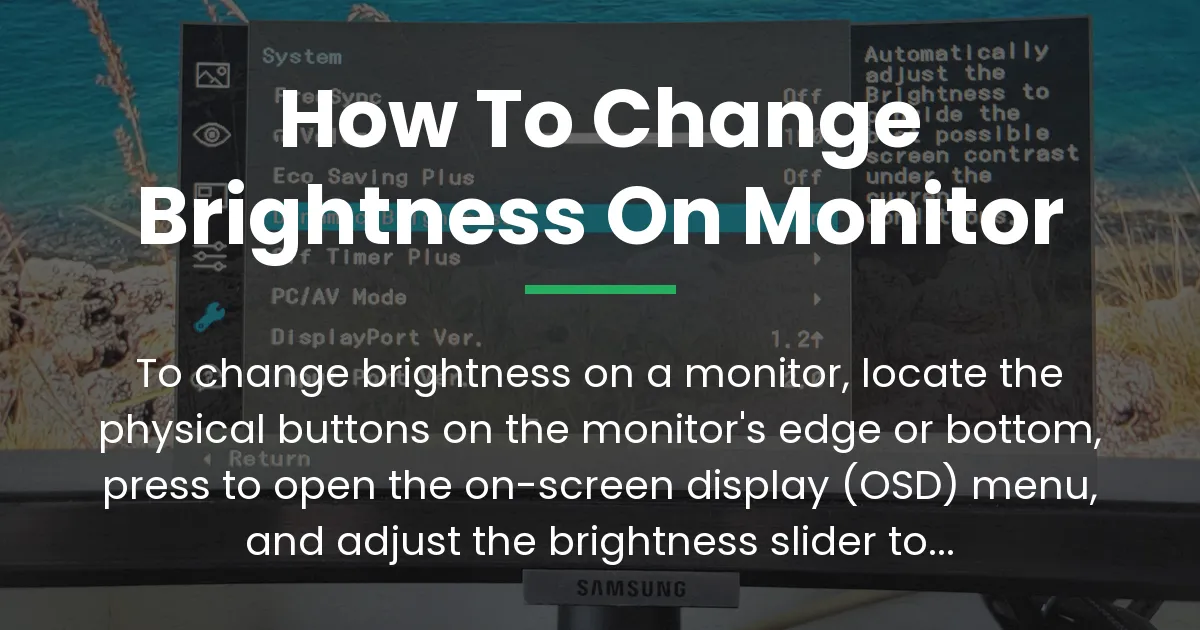
Once activated, the on-screen display menu appears, showing options like brightness, contrast, and color. Use the arrow buttons or joystick to navigate to the brightness icon, often represented by a sun symbol.
Select it to open the slider, then move it left for dimmer or right for brighter until it feels right for your eyes. Confirm your choice and exit the menu to apply the changes instantly.
- Locate the physical buttons on your monitor—typically on the front bottom, right side, or under a flap.
- Press the menu or input button to bring up the OSD (on-screen display) menu.
- Navigate using the directional controls to the brightness setting.
- Adjust the slider to your desired level, usually from 0 to 100 percent.
- Save and exit the menu; the change takes effect right away.
This method ensures quick tweaks without relying on software. If your monitor lacks visible buttons, we’ll explore alternatives later.
Basic Methods for Different Monitor Types
Building on the core button method, external monitors differ from built-in laptop screens in how they respond to controls. For standalone displays connected via HDMI or DisplayPort, stick to the device’s hardware adjustments as outlined earlier.
However, if you’re using a laptop’s integrated screen, your operating system offers a quick slider. On Windows, open the Action Center by pressing Windows key plus A, then drag the brightness tile up or down for immediate effect.
External Monitors
External monitors prioritize self-contained settings to maintain consistency across devices. This means even if you tweak your PC’s display options, the standalone unit won’t reflect those changes over standard video cables.
Always test the connection type first—USB-C might allow some pass-through controls, but HDMI and DisplayPort focus on video and audio data only. If the menu doesn’t appear, ensure the monitor is powered on separately from your computer.
Laptop and Internal Screens
For laptops, keyboard shortcuts often provide the fastest access to brightness changes. Most models use function keys like Fn plus F5 or F6, marked with sun icons, to step through levels incrementally.
Consequently, this bypasses menus entirely for on-the-fly adjustments during use. If the keys don’t work, check your BIOS settings or update keyboard drivers through device manager.
Shifting focus to cross-platform differences, Mac users with built-in displays can use the F1 and F2 keys for similar results. External monitors on Macs follow the same hardware rules as on PCs, requiring direct button use.
Why Software Controls Often Fail on External Monitors
Following the basic methods, it’s important to understand the technical reasons behind software limitations. Video cables like HDMI, DVI, DisplayPort, and VGA transmit only visual and audio data, not control signals for brightness or other hardware features.
As a result, your computer’s display settings, such as those in Settings > System > Display on Windows, apply solely to the internal screen or GPU-processed output. This separation exists for efficiency, allowing monitors to optimize their panels independently without constant PC intervention.
Moreover, graphics card control panels from NVIDIA or AMD might offer global tweaks, but they influence color and gamma rather than true backlight brightness on externals. For desktop PCs, this means no universal slider exists across all setups.
Therefore, attempting software fixes first can lead to confusion when nothing changes. Instead, always verify your cable type and monitor model specs for supported features like DDC/CI, a standard that enables limited PC-based control over compatible displays.
Troubleshooting Common Brightness Issues
Once you’ve tried the standard approaches, persistent problems like flickering or auto-dimming might arise. These often stem from environmental sensors or power-saving modes that override your manual settings.
To address auto-adjustments, enter the monitor’s OSD menu and look for an ambient light sensor option, then disable it if present. This prevents the screen from reacting to room lighting changes during movies or work.
If the brightness won’t hold steady, inspect the cable connections for looseness, as poor contact can cause intermittent signal loss mimicking dimming. Swap cables if possible to rule out faults in the HDMI or DisplayPort line.
Additionally, for HDR-enabled monitors, mismatched settings between your OS and display can lock the brightness. Toggle HDR off in Windows display settings or Mac’s display preferences to revert to standard dynamic range controls.
Should the screen go blank after adjustments, power cycle the monitor by unplugging it for 30 seconds. This resets temporary glitches without affecting saved preferences.
In cases of outdated firmware, visit the manufacturer’s site for updates, as newer versions fix bugs related to brightness stability. Apply them via USB if your model supports it, following the included instructions carefully.
Adjusting Brightness Without Physical Buttons
Extending from troubleshooting, some modern monitors omit tactile buttons in favor of touch-sensitive areas or no controls at all. In these scenarios, third-party software bridges the gap by simulating hardware commands over supported protocols.
For Windows users, tools like Twinkle Tray provide a system tray icon for direct slider access to external monitors. Download it from its official GitHub page, install, and configure hotkeys for quick adjustments without reaching for the screen.
Pros of this include seamless integration with your workflow and keyboard shortcuts for hands-free use. Cons involve compatibility limits, as it works best with monitors supporting DDC/CI over USB or certain display links.
On Linux, KDE desktop extensions offer similar tray-based controls for brightness management. Install via your package manager and enable the plugin to map adjustments to multimedia keys.
However, these solutions can’t override all hardware restrictions, so test on your setup first. If software fails, consider a monitor with remote controls or USB hubs that include adjustment buttons.
Advanced Adjustments for Better Control
After mastering basics and fixes, optimizing for specific needs elevates your viewing experience. Calibration tools ensure brightness aligns with your room’s lighting and content type, reducing eye strain over long sessions.
Use built-in OSD calibration wizards if available, or free apps like DisplayCAL for precise measurements with a colorimeter. This process involves setting a target luminance, often 120 candelas per square meter for office use.
Dell Monitors
For Dell models, the joystick control on the bottom right simplifies navigation. Press it to open the menu, then tilt up or down to highlight brightness and adjust in 5 percent increments.
Older S-series might require holding the preset button for five seconds to unlock full options. This hidden feature prevents accidental changes during transport.
HP and MSI Options
HP monitors feature a dedicated menu button on the right bezel, leading to a pop-up with brightness as the first tile. Select and drag virtually with the buttons; newer E-series auto-save to avoid confirmation prompts.
MSI displays often use side buttons for quick access, with a four-way directional pad for precise slider movement. Enable OSD Lock in settings if buttons seem unresponsive, unlocking via a 10-second hold.
Building on brand specifics, for Gigabyte or other lesser-covered models, check the user manual for unique key sequences. Many include a quick brightness shortcut by pressing two buttons simultaneously.
Furthermore, integrating with OS features like Night Light on Windows can complement hardware tweaks by warming colors without altering actual brightness. Activate it in display settings for evening use to ease blue light exposure.
Frequently Asked Questions
Frequently Asked Questions
How to change brightness on monitor without buttons?
Changing brightness on a monitor without buttons involves third-party software like Twinkle Tray for Windows, which adds a system tray icon for slider control over external displays. Install it from its official site, then right-click the tray icon to adjust levels instantly.
For more on software limits, see the section on why controls often fail.
How to change brightness on monitor Windows 11?
Changing brightness on a monitor in Windows 11 works through the Action Center for internal screens or monitor buttons for externals, as the OS slider won’t affect standalone hardware. Swipe from the right edge or use Windows + A to access it, but test with your cable type first.
Refer to basic methods for external setups.
How to change brightness on monitor Dell?
Changing brightness on a Dell monitor starts by pressing the joystick or buttons on the bottom bezel to open the OSD menu, then navigating to the brightness icon. Models like the S-series have a quick preset button; hold it for 5 seconds if stuck.
Check brand-specific guides for menu layouts.
How to change brightness on monitor PC?
Changing brightness on a monitor connected to a PC relies on the device’s physical controls, since PC software like graphics panels only tweaks internal displays. Use the monitor’s side buttons to enter display settings and slide up or down.
See troubleshooting if auto-changes occur.
How to change brightness on monitor Mac?
Changing brightness on a monitor with a Mac requires the monitor’s own buttons, as macOS lacks native sliders for external hardware over HDMI. For partial control, try apps like MonitorControl from the App Store to map keyboard shortcuts.
Explore advanced adjustments for tool details.
How to change brightness on monitor not laptop?
Changing brightness on a non-laptop monitor means using its built-in buttons, unlike laptop keys that only work internally. Locate them near the edge and press to access the menu slider.
If connected via USB-C, enable display controls in system preferences for extras.
How to change brightness on monitor with keyboard?
Changing brightness on a monitor using a keyboard shortcut is possible only through software bridges like AutoHotkey scripts on Windows, which simulate button presses. Set up a custom hotkey (e.g., Fn + F-keys) to trigger the OSD.
For no-button options, look at software workarounds.
How to change brightness on monitor HP?
Changing brightness on an HP monitor involves pressing the menu button on the right side, then selecting the brightness tile from the pop-up. Newer models like the E-series auto-save changes; older ones need confirmation.
Brand guides cover MSI similarities too.
In summary, knowing how to change brightness on monitor empowers you to customize your setup perfectly, whether through buttons, software, or tweaks. With these steps, you’ll avoid common pitfalls and enjoy a tailored display every time.
Experiment safely, and your screen will adapt to your needs without further hassle.