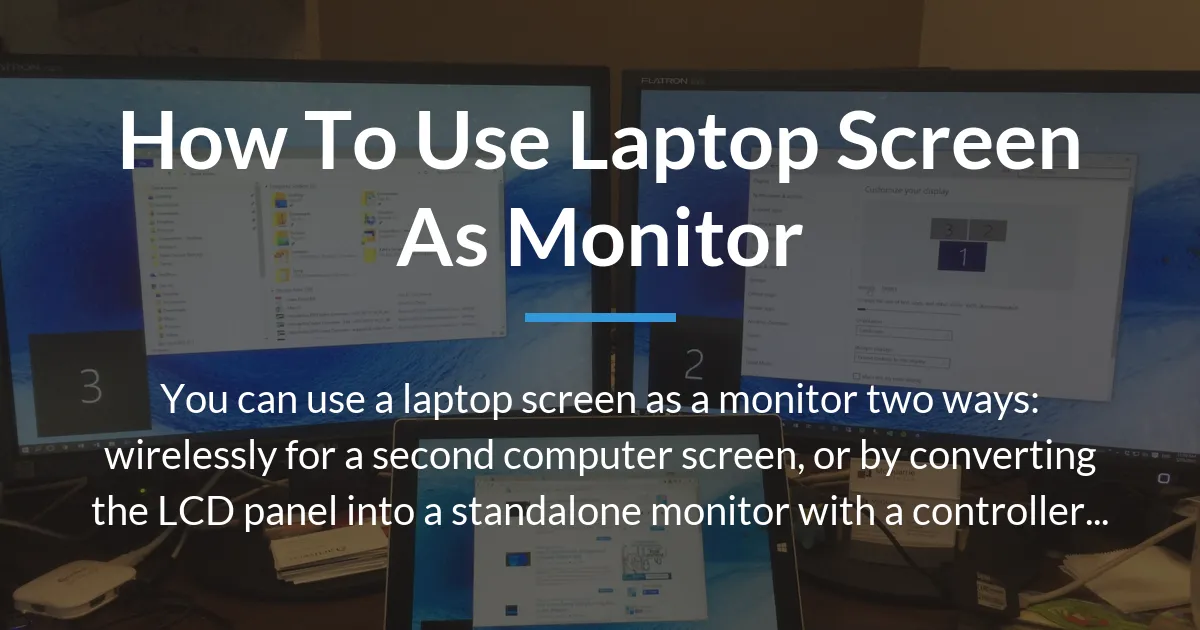
You might be looking at an old laptop or just need an extra display and wonder if that built-in screen can be reused. The good news is that you can use a laptop screen as a monitor, but it is not a single, simple process. There are two completely different approaches, and choosing the right one depends on what you are connecting and what you want to achieve. One method uses software to turn your entire laptop into a wireless second screen. The other is a hardware project that physically converts just the LCD panel into a separate monitor.
Understanding Your Two Choices
Most guides online treat this topic as one single task, but that leads to confusion. The phrase “use a laptop screen as a monitor” actually describes two separate ideas. It is crucial to understand the distinction from the start so you do not waste time on a method that will not work for your situation.
What It Really Means to Use a Laptop as a Monitor
When you think of a normal monitor, you imagine plugging an HDMI cable from your computer into it. A laptop screen does not work that way on its own. The first meaning is using the laptop as a complete device that receives a video signal from another computer, similar to how a smart TV works. The second meaning is extracting just the physical screen panel from the laptop and making it function like a standalone monitor by adding new electronics. These are different solutions for different problems.
The Wireless Display Method Explained
This approach uses the laptop’s built-in wireless capabilities and operating system. Your laptop stays fully assembled and powered on. It uses a feature that allows another computer to project its screen to the laptop over your Wi-Fi network. The laptop effectively becomes a secondary display that mirrors or extends the desktop of your main computer. It is a software-based solution that requires no extra cables or hardware, but it only works between compatible computers and networks.
The LCD Panel Conversion Method Explained
This is a hardware modification. You open the laptop and remove the thin LCD screen inside. That panel by itself cannot connect to anything because it lacks the standard video ports you find on a regular monitor. Laptop displays connect to the motherboard using special low-voltage differential signaling cables. To use it as a monitor, you must buy a small controller board that acts as a translator. This board takes a standard signal like HDMI and converts it into the language the LCD panel understands, allowing you to plug in devices like game consoles or a desktop PC.
Choosing the Right Method for Your Needs
You cannot pick a method without knowing your goal. Many people start trying the wireless method only to find it useless for gaming, or they buy a controller board without realizing they need to take their laptop apart. This decision guide will help you match your specific scenario to the correct path.
A Simple Guide to Decide Your Path
Ask yourself three questions. First, what is your source device? Is it another Windows or Mac computer, or is it a game console, Raspberry Pi, or security DVR? Second, what will you use the screen for? Is it for office work, watching videos, playing games, or a permanent project setup? Third, how comfortable are you with technology? Are you okay changing software settings, or are you willing to use tools and handle delicate electronics? Your answers will point you clearly to one method or the other.
Best for Quick Second Screens and Presentations
The wireless display method is perfect here. If your main computer is a desktop and you want to temporarily extend your workspace to your laptop for more windows, this is quick and easy. It is also great for presentations where you want to show your screen on the laptop without cables. This method works best when both devices are modern computers on the same network and you are not doing anything that requires instant screen response.
Best for Game Consoles and Permanent Setups
If your source is a PlayStation, Xbox, Nintendo Switch, or a single-board computer like a Raspberry Pi, the wireless method will not work. These devices do not have software to project to a laptop wirelessly. The only way to use a laptop screen for these is the LCD panel conversion. This creates a dedicated physical monitor that you can connect with an HDMI cable. It is ideal for a permanent setup in a workshop or for a custom gaming station.
When Neither Method Is the Right Answer
There are times when you should consider a different option altogether. If your laptop is very new and under warranty, taking it apart is a bad idea. If you need high refresh rates for competitive gaming, the wireless method has too much lag and the conversion method might not support high speeds. If the total cost of a controller board, power supply, and frame is high, buying a new portable USB-C monitor is often smarter, cheaper, and more reliable.
How to Use Your Laptop as a Wireless Second Screen
This process uses features built into Windows and macOS. It is important to know that performance is not like a wired monitor. There will be a slight delay, and video quality can suffer if your Wi-Fi is slow. Think of it as streaming video from one computer to another.
What You Need Before You Start
Both the laptop and the main computer must be on the same Wi-Fi network. For best results, use a 5 GHz network or ensure the devices support Wi-Fi Direct to connect without a router. Your laptop must be running a recent operating system. Windows 10 or 11 is needed for the built-in Miracast feature. For MacBooks, you need macOS Monterey or later to use AirPlay as a receiver. Check that your main computer also supports wireless projecting.
Setting Up on Your Windows Laptop
On the laptop you want to use as the screen, go to your settings. Open the System settings and click on “Projecting to this PC.” Change the first setting to “Available everywhere” or “Available on secure networks.” Also, make sure “Require PIN for pairing” is set to your preference. This prepares your laptop to receive a signal. You can also access this quickly from the Action Center by clicking the notification icon and selecting “Connect.”
Setting Up on Your MacBook
On your MacBook, click the Apple menu and open System Preferences. Go to the Displays section. Here, you will find an option that says “Show mirroring options in the menu bar when available.” Check this box. This will place an AirPlay icon in the top menu bar of your screen. When you click this icon later, you can choose to allow your Mac to be used as a display for another Apple device.
Connecting from Your Main Computer
Now, on the computer that you want to extend from, you initiate the connection. If it is a Windows PC, press the Windows Key and the P key at the same time. A sidebar will appear. Click on “Connect to a wireless display.” Your laptop should appear in the list of available devices after a moment. Select it to start the connection. On a Mac, use the AirPlay menu from the menu bar to find and select the laptop. Follow any prompts to enter a PIN if required.
The Real-World Performance You Can Expect
Do not expect this to feel like a normal monitor. There is noticeable input lag, which means your mouse cursor will feel slow or movements in videos will be slightly behind. This makes it poor for gaming or precise video editing. The image quality is also compressed to travel over Wi-Fi, so text might not be perfectly sharp and colors can look washed out. It is functional for viewing documents, web pages, or static images, but not for demanding tasks.
How to Convert a Laptop LCD into a Standalone Monitor
This is a project for those who enjoy DIY electronics. It involves disassembling a laptop, so it should only be done on an old or broken machine you are willing to risk. The most critical part is matching the correct controller board to your specific LCD panel model.
The Essential Tools and Parts You Must Have
You will need a small Phillips screwdriver, a plastic pry tool or guitar pick to open clips without scratching, and an anti-static wrist strap is recommended. The necessary parts are a controller board kit for your LCD panel, which sometimes includes the needed cables. You will also need a power adapter for the board, usually 12V, and an HDMI cable to connect your video source. Optionally, you can get a frame or case to mount everything neatly.
Safely Removing the Laptop Screen
Power off the laptop and disconnect the battery if it is removable. For most laptops, you start by removing the plastic bezel around the screen. This is held by small clips and sometimes screws hidden under rubber pads. Gently work your way around with the pry tool. Once the bezel is off, you will see screws holding the metal brackets of the LCD panel. Remove these screws carefully.
Now, the LCD panel is attached by hinges and connected to the laptop body with one or two ribbon cables. These cables are locked in place by small latches. Lift the latches slowly to release the cables, then pull them straight out. You can now lift the entire LCD panel assembly away from the laptop base. Place it face down on a soft cloth.
The Most Important Step: Finding Your Control Board
On the back of the LCD panel, there will be a white sticker with several numbers. Look for the model number, which often starts with letters like B, LTN, or LP. An example is “LP156WF6-SPB1.” This is the exact model of your panel. You must search for this number online along with the words “LCD controller board.” Websites like eBay or AliExpress sell these boards. Ensure the board listing explicitly states compatibility with your panel model. Buying a random board will not work.
Connecting the Panel, Board, and Power
The controller board will have a port for an LVDS cable. Connect one end of this cable to the connector on the LCD panel. The other end plugs into the board. Make sure the cable is oriented correctly; it usually has a tab that aligns. Next, connect the power adapter to the board’s DC input. Finally, use an HDMI cable to connect your video source, like a game console, to the HDMI port on the controller board.
Final Assembly and First Test
Before mounting anything, do a test. Plug in the power adapter to the controller board and turn on your video source. The LCD panel should light up and display the image. If it does not, double-check all connections and that the board is compatible. Once it works, you can secure the board to the back of the panel with tape or screws, and then place the whole unit into a frame or stand. Some people even use the original laptop lid as a case.
Common Challenges and Solutions
Both methods can run into problems. Knowing how to troubleshoot can save you hours of frustration. These are the most common issues people face and how to fix them.
Fixing Wireless Connection Problems
If the wireless display option does not appear or fails to connect, first check that both devices are on the same network. Restart both the laptop and the main computer. On Windows, ensure the “Wireless Display” optional feature is installed via Settings > Apps > Optional Features. Sometimes, outdated Wi-Fi drivers can cause issues, so update them from the manufacturer’s website. If you are on a public or corporate network, firewalls might block the connection, so try a private home network.
Troubleshooting a Blank Screen on Your Controller Board
When your converted screen stays black, start with the power. Check that the power adapter is plugged in and the board’s light is on. Verify every cable connection, especially the LVDS cable between the panel and board; it can easily come loose. Confirm that the controller board model is an exact match for your LCD panel. If everything seems correct, try a different HDMI cable and a different video source to rule out those issues. Some boards have tiny buttons to cycle through input sources; press them to ensure it is set to HDMI.
Managing Power for Your Converted Monitor
Controller boards need clean and adequate power. Use the power adapter that came with the board or one with the exact voltage and current rating. A weak power supply can cause the screen to flicker or not turn on. If you want to make the monitor portable, you can power some boards from a USB port or a power bank, but you must check the board’s input requirements. Do not guess with power, as incorrect voltage can permanently damage the board or the LCD panel.
Other Options to Consider
If the two main methods seem too limited or complex, there are alternative approaches that might suit your needs better. These options can provide more flexibility or better performance for specific use cases.
Using Video Capture Cards for Specific Devices
For devices that output HDMI, like a game console, you can use a USB video capture card. You plug the HDMI from the console into the capture card, and then plug the capture card into your laptop’s USB port. You use software on the laptop to view the captured video. However, this introduces even more lag than wireless projection and is really designed for recording or streaming, not for real-time gameplay. It is a workaround, but not a good solution for using the laptop as a primary monitor.
The Case for Buying a Portable USB-C Monitor
Sometimes, the best answer is to spend a little money on the right tool. Portable monitors have become affordable and connect easily via a single USB-C cable that carries both video and power. They are slim, light, and often have better brightness and color than an old laptop panel. For most people, especially those who want a plug-and-play second screen for travel or work, buying a portable monitor is simpler, more reliable, and offers a better experience than attempting a conversion project.
Learning how to use a laptop screen as a monitor requires you to pick the path that fits your devices and your skill level. The wireless method is a convenient software trick for computer-to-computer screen sharing. The conversion method is a rewarding hardware project for turning an old screen into a new monitor for consoles or microcomputers. Always weigh the effort and cost against simply purchasing a dedicated monitor, which often provides the best performance with the least hassle.
Frequently Asked Questions
Can I connect my laptop screen to a device with a simple HDMI cable?
No, you cannot connect a laptop screen directly with a simple HDMI cable. The internal connector on a laptop display is not HDMI; it is a different type like LVDS or eDP. You need a controller board to convert the HDMI signal for the screen.
Is the wireless method secure for office work?
The wireless method can be secure if you use it on a trusted, password-protected Wi-Fi network. The connection is usually encrypted. However, for highly sensitive data, a wired connection is always more secure than any wireless transmission.
Can I use a MacBook screen as a monitor for a Windows PC?
You can use a MacBook as a wireless monitor for a Windows PC only if both support a common protocol like Miracast, which most MacBooks do not. Software solutions exist but are often unreliable. The hardware conversion method works but is complex due to MacBook’s unique parts.
Will converting my laptop screen void its warranty?
Yes, converting your laptop screen will absolutely void its warranty. Disassembling the laptop breaks the warranty terms. Only attempt this on a laptop that is out of warranty and that you no longer need for its original purpose.
How do I find the exact model number of my laptop LCD panel?
You find the exact model number by opening the laptop and looking at the sticker on the back of the LCD panel itself. The model number is not the same as your laptop’s brand or model; it is specific to the screen component inside.
Can I use this method to create a monitor for my Raspberry Pi?
Yes, the LCD panel conversion method is excellent for creating a monitor for your Raspberry Pi. Once you have the controller board with HDMI input, you can plug the Raspberry Pi directly into it for a compact all-in-one setup.
What’s the input lag like on a controller board compared to a normal monitor?
The input lag on a controller board is generally low and comparable to an inexpensive normal monitor. It is much lower than the wireless method. However, high refresh rates may not be supported, so it might not be ideal for very fast competitive gaming.
Do I need a special frame for the LCD panel after removing it?
You do not strictly need a special frame, but it helps protect the panel and makes it easier to use. You can buy kits that include a frame, or you can build a simple one from wood or plastic. Without a frame, the glass panel is very fragile.
Can I use my laptop’s built-in speakers with the converted screen?
No, you cannot use the laptop’s built-in speakers with the converted screen. When you remove the LCD panel, the speakers stay in the laptop’s main body. You will need external speakers connected to your video source device for sound.
Is it cheaper to just buy a used monitor instead?
Very often, it is cheaper to buy a used monitor instead of converting a laptop screen. A controller board, power supply, and cables can cost $50 or more, while a small used monitor can be found for a similar price without any DIY work.