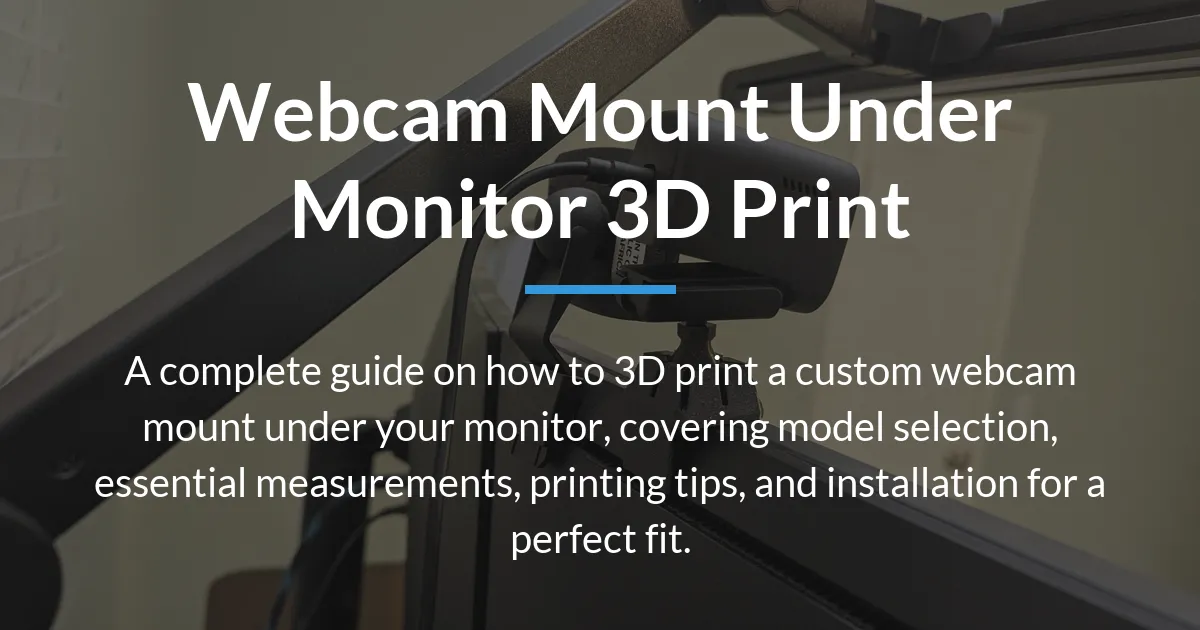
Struggling with awkward camera angles during video calls is a common frustration for many people. This guide will help you create a custom webcam mount under your monitor through 3D printing, moving beyond just finding a file to ensure a perfect and professional result.
The Real Benefit of an Under-Monitor Webcam
Mounting your webcam on top of the monitor often creates an unflattering downward angle. Positioning the camera under the monitor lifts the lens closer to your natural eye level.
This simple shift makes your video feed appear more direct and engaging while also freeing up valuable space on top of your screen.
Finding the Right 3D Model Design
The first step is choosing a digital blueprint that matches your hardware and preferences. Models generally fall into a few main categories, each with different benefits.
Your choice will determine the final look and security of your setup.
Monitor Clamp Designs
Clamp designs attach directly to your monitor’s bezel or stand using a screw or spring mechanism. They offer a very secure hold without any permanent adhesive.
This style requires you to know your monitor’s bezel thickness precisely for a snug and safe fit.
Adhesive-Based Mounts
These mounts use strong tape, like 3M VHB, to stick directly to the back of your monitor. They provide an ultra-slim profile and work on almost any bezel.
The trade-off is their semi-permanent nature, which can leave residue if you need to remove them later.
Specialized and Universal Mounts
Some files are designed for specific equipment, such as a Logitech Streamcam or a GoPro action cam. Universal mounts often feature an adjustable cradle or a wide platform.
You might also find designs that integrate a smartphone holder, turning your phone into a high-quality webcam.
Essential Measurements Before You Print
Printing a mount without the correct measurements is the most common reason for failure. You must gather a few key pieces of information first.
This checklist prevents wasted filament and ensures your final 3D printed parts work as intended.
Measure Your Monitor Bezel
Use calipers to measure the exact thickness of the monitor lip where the clamp will attach. A simple ruler can work if you are very careful.
Note if your monitor has a curved screen like the Samsung C49, as this affects how a clamp makes contact.
Know Your Webcam Specs
Find the dimensions and weight of your specific camera, whether it’s a Logitech Brio, an old C910, or an action cam. The mount must properly cradle its shape and support its weight.
This information is usually listed on the manufacturer’s website or retail product page.
Check Your Printer’s Capacity
Verify that the 3D model will fit within your printer’s build volume, such as that of an Ender 5 S1. Some mounts are long and may need to be printed at an angle or in sections.
Also, gather any needed hardware like M3 screws or rubber feet before you start printing.
Locating and Assessing 3D Files
Websites like Printables, Thangs, and Creality Cloud host thousands of free 3D models. Use specific search terms like “under monitor webcam clamp” along with your camera brand for the best results.
Look at the photos, description, and user comments to judge the model’s quality and real-world performance.
Understanding File Types
A standard .STL file is static and cannot be easily changed. A parametric file, often a .3MF file, allows you to input your exact measurements for a custom fit.
Choosing a safe parametric model is the easiest way to adapt a design to your unique monitor and webcam.
Preparing Your 3D Print for Success
Proper slicing settings are crucial for creating a strong, functional mount. This is not a decorative piece, so prioritize durability over speed.
Your goal is a rigid final product that will not flex or break under normal use.
Optimal Print Orientation and Settings
Orient the model in your slicer so that the clamp’s gripping jaws are printed with their layers running horizontally. This orientation makes them much stronger against the pressure of clamping.
Use at least four perimeter walls and 30-40% infill to ensure the mount has no flex.
Choosing the Right Material
PLA is easy to print but can creep or deform over time under constant pressure. PETG is more durable, temperature-resistant, and less brittle, making it an excellent choice for this office tool.
If your monitor gets warm, avoid using PLA near the exhaust vents where heat could soften it.
Assembling and Installing the Mount
Once the print is complete, some post-processing will ensure a clean installation. Carefully remove all support material and sand any rough edges, especially on the clamp’s contact points.
Test the clamp on your monitor bezel without the webcam attached to verify the fit and grip.
Securing the Camera and Cable
Attach your webcam to the printed cradle, using small rubber pads if needed for extra grip. Then, secure the entire assembly under your monitor, ensuring it is level and tight.
Finally, route the USB cable along the monitor arm or stand for a clean desk look, securing it with clips if necessary.
Customizing a Model for a Perfect Fit
Sometimes, you cannot find a model that matches your exact measurements. Basic 3D modeling skills let you modify an existing file for a perfect custom fit.
This process solves the problem of a bezel that is too thick or a webcam that is slightly different.
Simple Modifications with Tinkercad
You can import an STL file into the free, web-based tool Tinkercad. Use basic shapes to extend a clamp arm, thicken a weak point, or add a shim for a curved monitor.
This approach requires no advanced knowledge and can salvage an almost-perfect model.
Using Parametric Design Files
For more complex changes, seek out parametric designs labeled as “Safe Parametric” or “Customizable.” Opening these in software like FreeCAD allows you to enter your exact measurements into a spreadsheet.
The model will then update automatically to your specified dimensions, guaranteeing a correct fit.
Solving Common Mounting Problems
Even with good preparation, you might encounter minor issues after installation. Most problems have straightforward solutions that don’t require re-printing the entire part.
These fixes address real-world concerns about stability and monitor safety.
Fixing a Loose or Wobbly Mount
If the clamp is slightly loose, add a thin strip of adhesive foam tape to the inside of the jaw. For a more permanent shim, you can design and print a thin spacer that clips into the clamp.
This adds thickness and protects your monitor’s finish from scratches.
Preventing Sag and Ensuring Safety
A webcam that sags forward often needs more friction at the pivot point. Tightening the pivot screw or adding a small rubber washer can usually solve this.
Always ensure the clamp’s pressure is evenly distributed and never force a mount onto a bezel that is clearly too thick.
Frequently Asked Questions
Can I use a 3D printed webcam mount on a curved monitor?
Yes, but a standard clamp may not make full contact. An adhesive-based mount or a custom-printed shim that matches your monitor’s curve, like the Samsung C49 1800R, is often necessary for stability.
What is the strongest 3D printing material for this?
PETG is generally the best material for a webcam mount due to its strength, durability, and temperature resistance. It is less brittle than PLA and easier to print than ABS for most users.
My printed mount cracked. Can I fix it with glue?
You can use cyanoacrylate (super glue) for a temporary repair on non-critical cracks. However, a crack usually indicates a design flaw or insufficient strength, so re-printing with higher infill or in PETG is the better long-term solution.
Where do I find a mount for my specific webcam?
On model repository sites, use your webcam’s exact model name in the search, like “Logitech Brio mount.” Many universal mounts with adjustable cradles will also work perfectly for a wide range of cameras.
Is it safe for a heavy camera like a DSLR?
No, these plastic mounts are designed for lightweight webcams and phones. The torque from a heavy camera like a DSLR can easily break the plastic and potentially damage your monitor stand or screen.
How do I use my phone as a webcam with a mount?
Look for a 3D model that includes a smartphone holder. You can then use software like Apple’s Continuity Camera or third-party apps to turn your phone into a high-quality webcam that streams to your computer.
What if I don’t want to use any glue?
Many modern 3D printed designs are engineered to snap or screw together without any glue. Filter your search on model sites with terms like “no glue” or “snap fit” to find these assembly-friendly options.
Can I mount other things with these?
Yes, the same clamp principles work for other desk accessories. People often adapt these designs to hold microphone arms, monitor LED light bars, or small tools for a tentacle system of organization.
Do I need a special 3D printer?
No, any standard FDM 3D printer with a build plate large enough for the model will work. Popular models like those from Creality, including the Ender 5 S1, are perfectly capable of printing these functional parts.
How do I get the best results?
For the best results, carefully measure your setup, choose a parametric model if possible, print with PETG material at high infill, and test the fit before final assembly. Patience during each step leads to a professional outcome.
Creating your own webcam mount under your monitor via 3D printing is a rewarding project that upgrades your video presence. By focusing on precise measurement, mindful material choice, and practical troubleshooting, you can achieve a custom fit that looks and works great. This approach to a webcam mount under monitor 3d print gives you control over your workspace ergonomics and functionality.