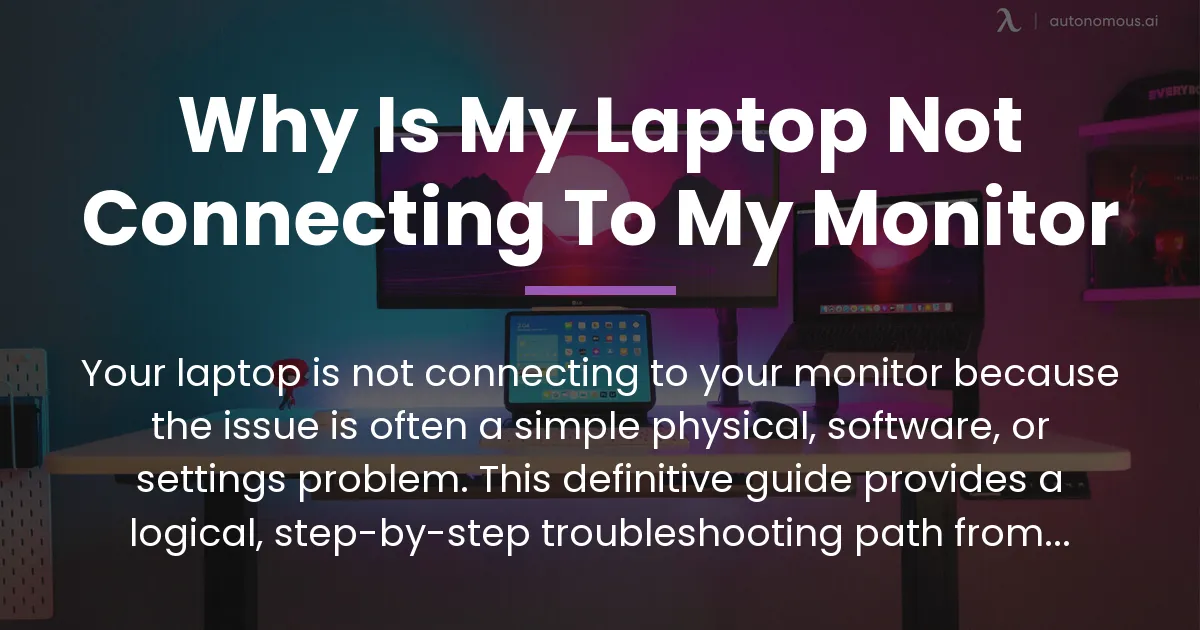
You press the power button on your laptop, you hear the familiar start-up sound, and you turn to your monitor expecting to see your desktop. Instead, you are met with a blank screen or a floating message that simply says “No Signal” or “Input Not Found.” A wave of frustration hits. Is the monitor broken? Did your laptop’s graphics card fail? Before you worry about expensive repairs or returns, take a deep breath. The vast majority of these connection failures are not due to catastrophic hardware damage. They are communication errors, small misconfigurations, or simple oversights that you can fix yourself.
This guide is designed to be your calm, systematic partner in solving this puzzle. We will not just give you a random list of things to try. We will follow a logical diagnostic path, starting with the simplest and most common solutions and moving step-by-step toward more complex checks. You will understand not just *what* to do, but *why* you are doing it. This knowledge will help you solve the problem now and give you the tools to fix it quickly if it happens again. Our journey will take us from the physical cable in your hand to the software inside your computer, ensuring no stone is left unturned.
The Immediate Fixes
When faced with a blank screen, your first moves should be the digital equivalent of checking if something is plugged in and turned on. These steps solve a significant percentage of connection problems, often within the first two minutes. They are simple, fast, and rule out the most common and embarrassing oversights. Always start here before you dive into more complicated procedures. This process clears temporary electronic glitches that can prevent two devices from talking to each other properly.
Power Cycle Everything
The first and most powerful tool is a complete power cycle. This means turning the power off and on again for both your laptop and your monitor, but in a specific order to reset the electronic handshake between them. Do not just put your laptop to sleep. You need to shut it down completely. Press and hold the physical power button on your laptop until it turns off completely. Do the same for your monitor—find its power button and turn it off.
Next, unplug the power cable from the back of your monitor. If your monitor has a removable external power brick, unplug that from the wall outlet as well. Wait for a full sixty seconds. This waiting period is crucial. It allows any residual electrical charge stored in the devices’ capacitors to completely drain, ensuring a fresh start. After the minute has passed, plug the monitor’s power back in and turn it on. Only then should you turn your laptop back on. This sequence forces both devices to re-introduce themselves from scratch, often clearing the “no signal” error immediately.
Check Physical Connections
Now, focus on the cable linking your laptop to your monitor. A loose connection is a frequent culprit. Do not just glance at it. Firmly grasp the cable connector where it plugs into your laptop’s port and push it in securely. You should feel a subtle click or a firm stop if it’s a connector with clips, like DisplayPort. Repeat this process at the monitor’s end. Cables can work themselves slightly loose over time from desk vibrations or accidental tugs, breaking the delicate electrical connection needed for a video signal.
While you are checking, look at the cable itself. Are there any sharp kinks, cuts, or crushing damage along its length? Is the connector bent or damaged? If you have a pet, check for tiny teeth marks. Any physical damage to the cable can interrupt the signal. If you have a spare video cable of any kind, even an old one, this is the perfect time to try it. Swapping the cable is the single fastest way to rule out cable failure as the root cause of your problem.
Select the Correct Input Source
Modern monitors often have multiple input ports: two HDMI ports, a DisplayPort, and maybe a VGA port. Your monitor is not psychic. It does not automatically know which port you plugged the cable into. You must tell it which one to listen to. On the monitor’s front or side, there will be buttons for its menu. Press the button that says “Input,” “Source,” or has a small icon of a box with an arrow going into it.
A menu will appear on the screen listing options like HDMI 1, HDMI 2, DisplayPort, and VGA. Use the monitor’s buttons to cycle through these options. If your laptop is on and the cable is good, you should see your desktop appear as soon as you select the correct one. It is surprisingly common for someone to plug a cable into HDMI 2 while the monitor is still set to look at HDMI 1. This simple check takes ten seconds and solves countless “no signal” mysteries.
Use the Windows Projection Shortcut
Your laptop might be sending a signal, but it could be configured to only show an image on its own built-in screen. You need to tell Windows to also send the picture to the external monitor. The fastest way to do this is with a keyboard shortcut. Make sure your laptop is on and the external monitor is powered on and set to the correct input. Then, on your laptop’s keyboard, press and hold the Windows logo key and tap the “P” key once.
A small menu will pop up on your laptop screen with four options: PC screen only, Duplicate, Extend, and Second screen only. Use your arrow keys to select “Duplicate” (which shows the same thing on both screens) or “Extend” (which makes the monitor an additional desktop space). Press Enter. If the connection is otherwise good, this should immediately send the signal to your monitor. This shortcut is your quickest software-based fix and is always worth trying early in your troubleshooting.
Diagnosing the Signal Path
If the quick fixes did not work, you need to think like a detective. The video signal must travel a physical path from your laptop’s graphics processor to your monitor’s display panel. A break anywhere along this path causes a failure. Your job is to find where that break is. This path, or signal chain, has several key components: the laptop’s output port, the cable, any adapter in use, and the monitor’s input port. The best way to find the faulty link is through a process called isolation testing.
This method involves testing each component separately with known-good parts from another system. You are not just trying things at random. You are gathering evidence to pinpoint the exact point of failure. This logical approach saves you time, money, and frustration. It prevents you from buying a new cable when the problem is your laptop’s port, or from suspecting your laptop when the monitor itself has an issue. Let us break down the chain and learn how to test each segment.
Testing the Monitor
Your first major isolation test is to determine if the monitor itself is functioning. To do this, you need a second video source that you know works perfectly. This could be another laptop, a desktop computer, a gaming console like a PlayStation or Xbox, or even a modern DVD or Blu-ray player with an HDMI output. Take the cable that is currently not working and connect this known-good source to your monitor.
If the known-good source displays perfectly on the monitor, then you have excellent news. The monitor, the cable, and the specific input port you used on the monitor are all working correctly. This means the problem exists *upstream*, in your laptop or its settings. However, if the known-good source also shows “No Signal” on the monitor, you have isolated the problem. The issue is with the monitor, the cable, or that specific input port on the monitor. You can then try a different cable or a different input port (like switching from HDMI 1 to HDMI 2) to narrow it down further.
Testing Your Laptop
The next logical test is to check if your laptop can successfully send a video signal to a different screen. You need a second display that you know works. This could be another computer monitor, a modern television, or a projector. Take your laptop and connect it to this known-good display using any cable you have, even if it is a different type than your original cable. If possible, avoid using adapters for this test to simplify the chain.
If your laptop displays perfectly on this second screen, then your laptop’s video output capability is confirmed to be working. The problem lies with your original monitor, the original cable, or the connection between them. If your laptop fails to show a picture on this second, known-good display, then the problem is almost certainly with your laptop’s software settings, graphics drivers, or hardware. This test is powerful because it clearly assigns blame to one side of the connection or the other.
Understanding Ports and Cables
Not all video connections are created equal. The type of port on your laptop and the type of cable you use form a critical part of the signal path. Using the wrong cable or misunderstanding what a port can do is a common source of connection failure. You need to know what you are working with. Look at the physical ports on the side or back of your laptop. They will have distinct shapes.
An HDMI port is a wide, flat trapezoid. A DisplayPort looks similar but has one corner cut at a sharper angle. A USB-C port is a small, oval port. Older laptops might have a VGA port, which is blue with rows of tiny holes, or a DVI port, which is white with a grid of pins. You must use a cable that matches the port on your laptop and the port on your monitor. You cannot plug an HDMI cable into a DisplayPort socket without a specific adapter.
HDMI Cables
HDMI is the most common consumer video cable. It carries video and audio in one cable. For most basic connections, any standard HDMI cable will work. However, problems can arise with very long cables (over 15 feet) or if you are trying to send a very high-resolution signal, like 4K at 60Hz. A cheap, thin cable might not handle the high data rate needed for 4K, resulting in a flickering or absent signal. If you are connecting a 4K monitor and having issues, trying a certified “High-Speed” HDMI cable is a wise step.
DisplayPort Cables
DisplayPort is very common on computer monitors and higher-end laptops. It is an excellent standard for high-resolution and high-refresh-rate displays. Like HDMI, a standard DisplayPort cable is usually sufficient. One unique feature of DisplayPort is a small physical latch on the connector. When you insert it, you should hear or feel a subtle click. An unlatched DisplayPort cable can easily slip out just enough to break the connection. Always ensure it is fully seated and latched.
The USB-C Complexity
This is where confusion often happens. A USB-C port is just a shape. It does not automatically mean it can output video. For a USB-C port to send a video signal to a monitor, it must support a feature called “DisplayPort Alternate Mode” or, less commonly, “HDMI Alternate Mode.” Most modern laptops with USB-C do support this, but not all. Furthermore, some USB-C ports are also Thunderbolt ports, which definitely support video output.
If your laptop only has USB-C ports, you will need a specific cable or adapter: either a USB-C to HDMI cable, a USB-C to DisplayPort cable, or a USB-C hub with video outputs. Critically, not all USB-C adapters are created equal. For resolutions above 1080p, you often need an “active” adapter, which contains a small chip to convert the signal properly. A cheap, passive adapter might only work at lower resolutions or not at all.
The Role of Adapters
Adapters are convenient but introduce another potential point of failure. You might use a simple plug adapter to change a DisplayPort plug to an HDMI socket, or a more complex multi-port hub. These small devices can fail. They can also cause compatibility issues, especially with higher resolutions. When troubleshooting, if you are using an adapter, try to remove it from the equation. Test with a direct cable from your laptop’s native port to the monitor’s native port. If that works, you know the adapter is the problem.
Windows and Software Settings
Once you have confirmed the physical chain of laptop, cable, and monitor is intact, the next area to investigate is the digital world inside your computer. Windows and its graphics drivers are responsible for generating and managing the video signal. A misconfiguration here can prevent the signal from being sent correctly, even if all the hardware is perfect. This software layer acts as the translator between your applications and the physical display.
Navigating Display Settings
Windows has a dedicated control center for all connected displays. To access it, right-click on an empty area of your laptop’s desktop and select “Display settings” from the menu that appears. If you cannot see your desktop because the external monitor is blank, you can still navigate using your laptop’s built-in screen. This window shows a schematic representation of your displays. If your external monitor is detected but not active, you might see two numbered boxes, but one is grayed out.
Scroll down in this settings window and click the “Detect” button. This forces Windows to actively search for any connected monitors it might have missed. If your monitor appears after this, you can then configure it. Click on the box representing the external monitor. Further down, you will find settings for “Multiple displays.” Here, you can choose “Duplicate these displays” or “Extend these displays.” Selecting one of these should enable the external screen. You can also set the correct resolution and orientation for the monitor from this screen.
The Graphics Control Panel
In addition to Windows settings, your laptop’s graphics hardware from Intel, NVIDIA, or AMD has its own more advanced control panel. This software gives you finer control over the display output. You can usually access it by right-clicking the desktop and looking for an option like “NVIDIA Control Panel,” “AMD Radeon Software,” or “Intel Graphics Command Center.”
Inside these control panels, look for sections named “Display,” “Set up multiple displays,” or “Desktop & Display.” These panels often have more robust detection tools and display management options than the basic Windows settings. They can sometimes detect a connection that Windows itself is struggling to see. If your monitor is detected here but not in Windows, it can point to a Windows-level software issue rather than a driver-level one.
Updating Graphics Drivers
Drivers are the essential software that allows Windows to communicate with your laptop’s graphics hardware. Outdated, corrupted, or incorrectly installed drivers are a leading cause of external display problems. Think of a driver as a translator. If the translator is using an old dictionary or is confused, the message (the video signal) gets lost. Updating the driver is like getting a new, fluent translator.
To check your drivers, right-click on the Windows Start button and select “Device Manager.” In the window that opens, find and click the arrow next to “Display adapters.” You will see one or two entries, like “Intel(R) UHD Graphics” and possibly “NVIDIA GeForce.” Right-click on the primary display adapter (often the Intel one for laptops) and select “Update driver.” Choose “Search automatically for drivers.” Windows will look online for a newer version.
If Windows says you have the best driver already, do not stop there. The driver Windows provides is often a generic, stable version that lags behind the latest from the manufacturer. For the best compatibility with external monitors, you should get the driver directly from the source. Visit the website of your graphics chip manufacturer. If you have an NVIDIA card, go to nvidia.com/drivers. For AMD, go to amd.com/support. For Intel graphics, visit intel.com/drivers.
Use their automatic detection tool or manually select your laptop’s exact graphics model and download the latest driver package. Run the installer. During installation, pay close attention. Look for a checkbox that says “Perform a clean installation” or similar. Selecting this option tells the installer to completely remove all old driver files before installing the new ones. This “clean install” is the single most effective way to fix persistent, weird driver-related issues that a standard update might not resolve. After installation, restart your laptop as prompted.
The Docking Station Wild Card
Docking stations are incredibly convenient, turning a single USB-C or Thunderbolt connection into a hub for your monitor, keyboard, mouse, and other peripherals. However, they add significant complexity to the signal path. Your video signal now must travel from your laptop, through the dock’s circuitry, and then out to your monitor. This introduces several new potential failure points that do not exist in a direct cable connection. If you are using a dock and your monitor is not working, the dock itself is the prime suspect.
Dock-Specific Troubleshooting
First, ensure the dock is receiving adequate power. Most docks require their own external power adapter to function correctly, especially when driving a monitor. Check that the dock’s power brick is firmly plugged into both the wall and the dock itself. A dim or absent light on the dock can indicate a power issue. Try unplugging and replugging the dock’s power, just like you did with the monitor during the power cycle.
Second, not all USB-C ports on a laptop are created equal. Some laptops have multiple USB-C ports, but only one of them is connected directly to the graphics hardware for video output. The others might only be for data and charging. Consult your laptop’s manual or support website to identify which specific port is the “video-out” or “DisplayPort over USB-C” port. Your dock *must* be connected to this port to send video. If it is plugged into a data-only port, the monitor will never work.
Updating Dock Firmware
A docking station is a small computer in its own right, and it runs low-level software called firmware. Outdated dock firmware can cause compatibility issues with your specific laptop model or with newer versions of Windows. Visit the website of your dock’s manufacturer (e.g., Dell, HP, Lenovo, CalDigit, Plugable). Navigate to their support or downloads section, find your exact dock model, and look for any available firmware updates.
The update process usually involves connecting the dock to a working computer and running a special update utility. Keeping your dock’s firmware current is a critical but often overlooked maintenance step that can resolve mysterious and intermittent connection problems.
Simplifying the Connection
When actively troubleshooting a dock-related video problem, the best strategy is to simplify. Disconnect the dock entirely. Take the video cable that goes from your dock to your monitor and connect it directly from your laptop’s video output port to the monitor. If the monitor works perfectly with this direct connection, you have conclusively proven that the problem lies with the dock, its cables, its power, or its settings. This simple test saves you hours of fiddling with laptop settings when the dock was the culprit all along.
Advanced Hardware Checks
If you have methodically worked through all the previous steps—physical connections, cable swaps, software settings, driver updates, and dock tests—and your monitor still shows no signal, you must consider the possibility of a hardware fault. This is rare, but it happens. The goal now is to gather enough evidence to understand what might have failed, which can guide a repair decision.
Testing the Laptop’s Video Port
A physical failure of the video output port on your laptop is uncommon but possible. Signs of physical damage include a bent or broken connector inside the port, or looseness where the port is soldered to the laptop’s main circuit board. More subtly, the port’s internal electronics can fail. One advanced test is to enter your laptop’s BIOS or UEFI settings menu. You do this by pressing a specific key (like F2, Delete, or F10) repeatedly immediately after pressing the power button.
If you can get into the BIOS screen and it displays on your external monitor, this is very important information. The BIOS loads before the Windows operating system and its drivers. If the monitor works in the BIOS but not in Windows, the problem is almost certainly a software or driver issue within Windows, not a hardware failure of the port. If the monitor does *not* work in the BIOS, even after all other tests, it points more strongly toward a hardware problem with the port, the cable, or the monitor.
Understanding Graphics Hardware Failure
Complete failure of a laptop’s dedicated graphics card (GPU) is serious but usually presents with additional symptoms beyond just a non-working external monitor. If your GPU is failing, you would likely see graphical glitches, artifacts (strange colors or shapes), or sudden crashes on your laptop’s own built-in screen, especially when performing graphics-intensive tasks. The laptop might also freeze or display blue screen errors related to the graphics driver.
If the laptop’s internal display works flawlessly for all tasks and only the external output is dead, a total GPU failure is less likely. The problem is more probably isolated to the specific circuitry or port that handles the external signal output. This is still a hardware repair, but it is often a different and sometimes less expensive component than the main graphics processor.
When to Seek Professional Repair
Your own troubleshooting has a natural limit. If you have isolated the problem to your laptop’s hardware and it is still under warranty, contact the manufacturer immediately. Do not open the laptop yourself, as this will often void the warranty. Describe the detailed troubleshooting steps you have already performed. This shows the support technician you are not just calling about a loose cable, which can lead to a faster and more serious response.
If the laptop is out of warranty, seek a reputable local computer repair shop. Give them a clear history: “The external monitor gets no signal. I have tested the monitor and cable with another computer and they work. I have tested the laptop with another monitor and it does not. I have updated drivers and performed a clean install. The monitor also does not display the BIOS screen.” This precise information saves them diagnostic time and helps them focus on the likely faulty component, such as the video port or the internal video output circuitry.
Frequently Asked Questions About Monitor Connections
I’ve tried everything, still no signal. What now?
If you have exhausted all logical steps, return to the principle of isolation with absolute rigor. You must determine, without any doubt, which device is at fault. Find a friend or colleague with a working laptop and a working monitor. Test your monitor with their known-good laptop and cable. Then, test your laptop with their known-good monitor and cable. This four-way swap will give you a definitive answer. If your monitor works with their laptop, and your laptop fails with their monitor, the problem is 100% with your laptop’s hardware or a deeply rooted software issue requiring a Windows reset. This final test removes all ambiguity.
Do I need to install drivers for the monitor itself?
For basic functionality, almost never. Modern monitors are “plug and play” devices over HDMI, DisplayPort, and DVI. The driver your computer needs is for its own graphics adapter (GPU), which is responsible for generating the signal. The monitor simply displays it. Windows might automatically install a generic “PnP Monitor” driver. Sometimes, monitor manufacturers offer optional driver files (called INF files) on their website. These are not true drivers in the usual sense; they primarily provide Windows with the monitor’s exact name and supported resolutions for the display settings menu. They rarely fix a “no signal” problem. Your focus should remain on your laptop’s graphics drivers.
Could this problem damage my laptop or monitor?
The risk of causing physical damage by troubleshooting a video connection is extraordinarily low. These are low-voltage signals designed to be hot-plugged (connected while devices are on). Trying different cables, pressing the “Detect” button in settings, or updating drivers will not harm your equipment. The only minor risk would be from physically forcing a connector into the wrong port, which is difficult to do by accident due to the different shapes of HDMI, DisplayPort, and USB-C. You can troubleshoot with confidence that you are not making the situation worse.
Why does it work sometimes and not others?
Intermittent problems are often the most frustrating. They typically point to a physical connection issue. A slightly loose cable, a failing cable where the internal wires are barely connected, or a damaged port that loses connection when moved are common culprits. It can also point to a driver instability, especially if the failure happens when waking the laptop from sleep. For intermittent issues, focus most on the physical layer: secure all connections firmly, try a new cable, and avoid moving the laptop or cable once connected. If the problem coincides with sleep/wake cycles, try changing your laptop’s power settings to avoid putting the display to sleep.
Is there a difference between duplicate and extend modes?
Yes, and choosing the wrong one can sometimes cause confusion, though not usually a “no signal” error. Duplicate mode mirrors your laptop screen exactly onto the external monitor. Both displays show the same thing. Extend mode treats the external monitor as additional desktop space. Your mouse cursor can move off the side of your laptop screen onto the monitor, as if you have one very wide desktop. If you are in “Second screen only” mode, your laptop’s built-in display will turn off and only the external monitor will work. Use the Windows Key + P shortcut to cycle through these modes if you are unsure which one is active.
Successfully connecting a laptop to a monitor should be a simple, plug-and-play experience. When it is not, the problem can feel overwhelming. The key is to reject panic and adopt a systematic approach. Remember the hierarchy: start with the physical world of cables and power, then move to the software world of Windows settings and drivers, and finally consider hardware as a last resort. By understanding the signal path from your laptop’s processor to the monitor’s screen, you become empowered to diagnose the break in the chain. You now have a clear, logical roadmap from the first moment you see “No Signal” to a final resolution. Whether the fix was reseating a cable, updating a driver, or identifying a faulty dock, the process itself is a valuable skill. Keep this guide handy, and you will never have to wonder why your laptop is not connecting to your monitor again.