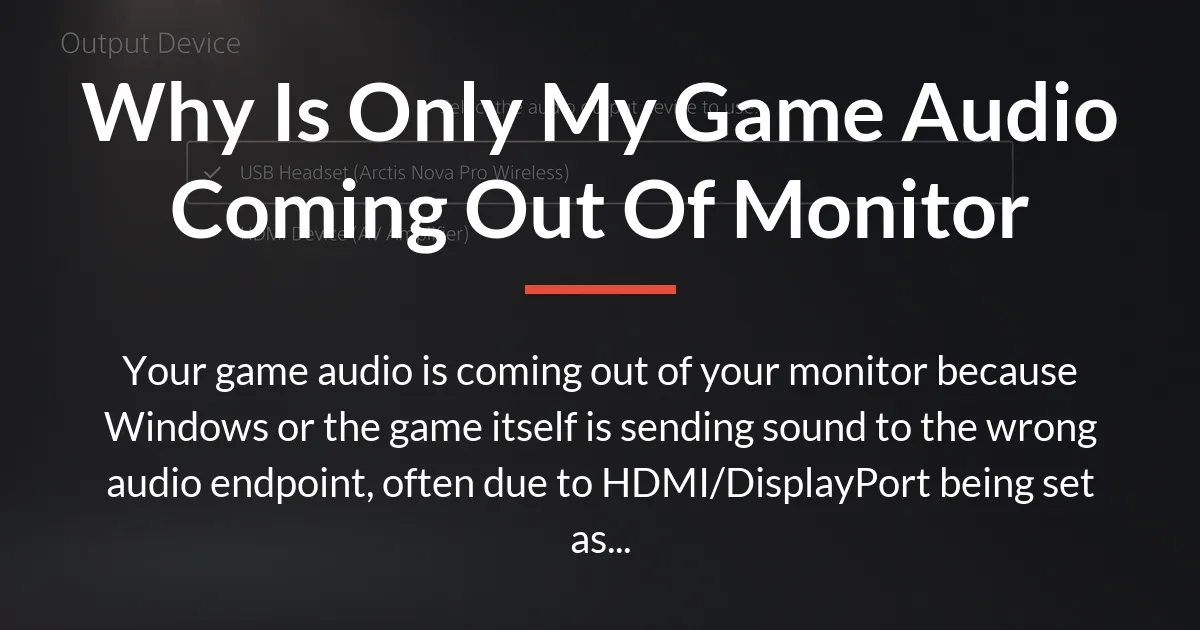
You put on your headset, launch your favorite game, and instead of immersive sound in your ears, the audio blasts from your monitor’s tiny speakers. It is a confusing and frustrating problem. Everything else on your computer, like YouTube videos or music, plays through the correct speakers or headphones. But your game sound refuses to follow the rules.
This issue is a common puzzle in the world of Windows gaming. It feels like a glitch that should not happen. The good news is that your hardware is almost certainly fine. This is almost always a software or settings problem that you can fix yourself. This guide will do more than just list quick fixes.
We will explain exactly why games sometimes pick the wrong sound output. You will learn about the hidden Windows settings that control this behavior. We provide a clear, step-by-step checklist to diagnose and solve the problem for good. Finally, we will show you how to set up your audio correctly to prevent it from ever happening again, whether you are on a standard PC, using Xbox Game Pass, or even streaming.
The Short Answer
The most direct answer to why is only my game audio coming out of my monitor is a simple Windows setting. Your computer has a list of places it can send sound. Your monitor, because it is connected by an HDMI or DisplayPort cable, is on that list. Windows or your game has decided to use the monitor as the primary sound output device instead of your headphones or speakers.
This often happens for one of two specific reasons. The first is that your monitor’s audio is set as the “Default Output Device” for all sounds in Windows. The second, and more tricky reason, involves a separate setting called the “Default Communications Device.” This split is why sometimes your game sound goes to the monitor but your Discord chat stays in your headset.
| Symptom | Most Likely Cause |
|---|---|
| All game audio comes from the monitor. | “Default Output Device” in Windows is set to the monitor. |
| Game audio is on the monitor, but voice chat is in your headset. | “Default Communications Device” is different from your main “Default Device.” |
| Audio switches to the monitor only when you launch a specific game. | The game’s own audio settings are overriding Windows. |
Understanding this is the key to fixing it. You do not need to buy new parts. You just need to guide Windows and your games to use the correct sound destination.
How Windows Handles Sound
To fix the problem, you first need to know how your computer manages sound. Think of your computer’s audio system like a large office building with many rooms. Each room is an “audio endpoint.” Your headphones are one room. Your monitor’s speakers are another. Your desktop speakers are a third.
Windows is the building manager. It needs to know where to send different types of sound. For general sound, like system noises, music, or video audio, Windows uses the “Default Output Device.” This is the main room where most sounds are delivered.
The Two-Device System
Windows has a special feature for communication. This is why the problem of game audio on the monitor can feel so specific. It creates a separate path for voice chat audio from apps like Discord, Xbox Game Bar, or any phone call software.
The setting for this path is called the “Default Communications Device.” It is designed so you can control your friend’s chat volume independently from your game’s volume. For example, you could have game sounds on speakers and chat in your headset.
The trouble starts when these two “default” settings point to different places. If your Default Device is your headset, but your Default Communications Device is your monitor, here is what happens. Your game, which usually follows the Default Device, plays sound in your headset. But the moment you join a Discord call, Windows might reroute *all* game audio to the Communications Device—your monitor—because it sees a communication event starting.
Some modern games and apps, especially those from the Xbox Game Pass service, also pay special attention to the Communications Device. They might send their sound there by default, expecting it to be your headset for chat. If it is set to your monitor, the game audio goes there instead.
The Role of HDMI and DisplayPort
Your monitor appears as a sound device because of the cable connecting it to your computer. HDMI and DisplayPort cables are not just for video. They carry a digital audio signal as well. This is very convenient for connecting a game console to a TV, for instance.
On a PC, your graphics card has a small audio chip built into it just for this purpose. When you connect your monitor, Windows installs a driver for “NVIDIA High Definition Audio” or “AMD High Definition Audio” or something similar. This creates a new audio endpoint called something like “Digital Display Audio.”
Windows sometimes gets confused and thinks this new digital audio output is the best one to use. It might automatically set it as the default device, especially after a driver update or when you plug in the monitor for the first time. Your game then uses this default, and the sound comes from the monitor.
Step-by-Step Diagnostic Checklist
Follow these steps in order. Start with the simplest and most common solutions first. Most people will find their answer in the first few steps.
Check Physical Connections
Before diving into software, do a quick physical check. If you are using headphones with a 3.5mm jack, ensure they are fully plugged into the correct port on your computer. Often, the case has a port on the front and the motherboard has ports on the back. Try both.
If you use a USB headset, try unplugging it and plugging it back in. Try a different USB port if possible. For wireless headsets, make sure they are powered on and fully connected to their USB dongle or Bluetooth. This simple step can reset the connection and force Windows to recognize the device properly.
Use the Windows Sound Troubleshooter
Windows includes a built-in tool that can find and fix common audio problems automatically. It is a great first step within the software. To run it, right-click the speaker icon in your taskbar and select “Troubleshoot sound problems.”
Follow the instructions on the screen. The troubleshooter will test your audio devices and might reset certain settings or drivers. While it will not always solve the specific game-to-monitor issue, it can fix underlying problems that are contributing to it.
Verify Default Audio Devices
This is the most critical step. You need to open the classic Windows Sound Control Panel. Right-click the speaker icon in your taskbar and choose “Sounds.” Alternatively, type “Control Panel” in the Windows search bar, open it, and then go to “Hardware and Sound” > “Sound.”
Click on the “Playback” tab. You will see a list of all the audio devices your computer knows about. Your headphones, your speakers, and your monitor (likely called “Digital Display Audio” or similar) will be here. Devices that are currently connected and working will have a green checkmark.
Find your preferred headphones or speakers in the list. Click on them to select them. Then, click the “Set Default” button at the bottom. This makes them the Default Device for all sound. Immediately after, click the “Set Default” button again. It should now say “Set as Default Communication Device.” This ensures both default settings point to the same device.
Now, find your monitor in the list. Right-click on it and select “Disable.” This removes it as an option for any program to use. You can always enable it later if you need it for some reason. Click “Apply” and then “OK.”
Check Individual Game Settings
Many modern games have their own audio output settings that override the Windows default. This is a common reason the problem only happens in one specific game. You need to launch the game and go to its Settings or Options menu.
Look for an “Audio,” “Sound,” or “Playback” section. Inside, there should be a dropdown menu for “Output Device,” “Audio Device,” or “Playback Device.” It might be set to “Default System Device.” Change this dropdown to specifically name your headphones or speakers.
For games on Steam, you can also check Steam’s own audio settings. In the Steam client, go to Steam > Settings > Audio. Here you can set a default playback device for all Steam games, which can override individual game settings.
Update Your Audio Drivers
Outdated or corrupted drivers can cause all sorts of audio routing issues. There are two sets of drivers to check: your motherboard audio drivers and your graphics card audio drivers.
First, update your graphics card audio driver. If you have an NVIDIA card, open the GeForce Experience app and check for updates. For AMD, use the Radeon Software app. These updates include the “High Definition Audio” driver that makes your monitor appear as a speaker.
Second, update your motherboard’s audio driver. This controls the 3.5mm and rear audio ports. You can find this driver on your PC manufacturer’s website (for pre-built PCs) or your motherboard manufacturer’s website (for custom-built PCs). Look for “Realtek Audio Driver” or similar.
Instead of just updating, you can also try a clean reinstall. In the Windows search bar, type “Device Manager” and open it. Expand the “Sound, video and game controllers” section. Right-click on your audio devices (like “Realtek Audio” and “NVIDIA Virtual Audio Device”) and choose “Uninstall device.” Restart your computer. Windows will automatically reinstall basic drivers, which can often resolve conflicts.
Disable Unused Audio Devices
Having too many active audio endpoints can confuse Windows. After you have set your correct defaults, you can clean up the list in Device Manager to prevent any mistakes. Open Device Manager again and expand “Sound, video and game controllers.”
Look for entries related to your monitor’s audio, like “NVIDIA High Definition Audio” or “AMD High Definition Audio.” Right-click on it and select “Disable device.” Do not uninstall it this time, as that might cause it to reappear later. Disabling it simply hides it from Windows and your games, so it cannot be selected by accident.
You can also disable any other virtual audio devices you do not use, like those from old recording software. Only disable devices you are sure you do not need. Restart your computer after making these changes.
Proactive Audio Setup Guide
Once you have fixed the problem, follow these steps to configure your system perfectly. This will prevent the issue from coming back and give you the best gaming audio experience.
For Standard PC Gaming
The goal is unity. You want all sound, both game audio and voice chat, to come from your primary headset or speakers. Open the Sound Control Panel as described earlier. Select your main device. Click “Set Default,” and then click it again to also set it as the Default Communications Device.
Right-click every other device in the list, especially your monitor, and choose “Disable.” This creates a simple, foolproof system where there is only one clear choice for any program to use. Every game and application will now send sound to the same place.
For Xbox Game Pass and Microsoft Store Games
Games from the Microsoft Store and the Xbox Game Pass app have a tighter integration with Windows’ modern sound settings. They often ignore the old Control Panel and listen to the newer Windows Settings menu.
Press the Windows key + I to open Settings. Go to “System” > “Sound.” Under “Output,” make sure your correct device is selected. Then, scroll down to “Advanced” and click on “Volume mixer.” Here, you can see per-app volume controls. If your game is running, it will appear here. You can click on the dropdown under the game’s name to force it to use a specific output device, separate from the system default.
Also, open the Xbox Game Bar by pressing Windows key + G. Go to Settings (the cog icon) > “Audio.” Here, you can explicitly choose which device the Game Bar uses for chat recording and playback. Set this to match your primary device.
For Streamers Using OBS
Streamers face a unique challenge. You need to capture game audio without creating an echo loop from your monitor. The key is to manage your “Audio Sources” in OBS Studio carefully.
In OBS, look at your audio mixer. You will have sources like “Desktop Audio” and “Mic/Aux.” Right-click the gear icon in the “Desktop Audio” section and go to “Properties.” The “Device” dropdown here is what OBS captures. Set this to your primary game audio device (your headset).
Do not capture the “Monitor” audio device. If you are using a capture card for a console, its audio will be a separate source. For your microphone, add a “Noise Suppression” filter and a “Noise Gate” filter to prevent your audience from hearing game audio echoing from your room speakers or monitor.
Use the “Monitor” function in OBS’s Advanced Audio Properties with caution. If you set a source to “Monitor and Output,” it will play that sound on your default Windows device, which could cause an echo if you are not using headphones.
Common Myths and Misconceptions
When searching for a fix, you will hear many theories. Let us clear up the most common incorrect ideas.
One major myth is that you need to buy a new HDMI cable or that your current cable is faulty. While a broken cable can cause no sound, it will almost never cause sound to route to the wrong place. This is a software routing issue, not a signal quality issue. A new cable will not change which device Windows selects as default.
Another common fear is that your graphics card or monitor is broken. This is extremely unlikely. If your monitor displays a picture, the video part of the hardware is working. The audio over HDMI is a simple digital function that either works or does not. The fact that audio comes out of the monitor at all proves the hardware chain is functional. The problem is a decision being made by Windows or your game, not a failure of the hardware.
Some people think you need to completely wipe all audio drivers from your system and start over. This is a nuclear option that is rarely necessary and can create more problems. The targeted driver update and reinstall process we outlined is safer and more effective. It fixes the specific driver for the specific device causing trouble without disrupting the rest of your system’s audio.
A final misconception is that this only happens with cheap equipment. This issue affects all levels of hardware, from budget monitors to expensive gaming setups. It is a quirk of the Windows audio architecture and how games interact with it, not a sign of poor quality gear. Users with very expensive audio interfaces and professional headphones encounter this same problem.
Frequently Asked Questions
Why does my audio work fine until I join a Discord call?
This is the classic sign of a split between your Default Device and Default Communications Device. Before the call, your game uses the Default Device (likely your headset). The moment Discord activates for a call, it uses the Default Communications Device. If that is set to your monitor, Windows may shift the game audio to that device as well. The fix is to set your headset as both the Default Device and the Default Communications Device in the Windows Sound Control Panel.
I fixed it, but the problem comes back after restarting my PC. Why?
This usually means a piece of software is reapplying its preferred settings on startup. It could be your graphics card driver software (like NVIDIA Control Panel) resetting the HDMI audio as primary. It could also be a game that saves its audio output choice in its settings file and reapplies it every launch. The solution is to combine the fixes. First, set your correct defaults in Windows. Then, open the problematic game and set its audio output correctly within the game’s settings. Finally, consider disabling the monitor audio device entirely in Device Manager so no software can select it.
I use a USB headset. Should not that prevent this issue?
USB headsets do simplify things because they create their own unique audio endpoint that is hard for Windows to confuse with something else. However, the issue can still occur. If the Windows Communications Device is set to your monitor, voice chat from Discord could still go there. Some games might also have a dropdown menu where the monitor is selected. Always check the in-game audio settings even with a USB headset. The core principle remains: you must guide the software to the correct output.
Does Windows 11 handle this differently than Windows 10?
The core audio architecture is the same. Windows 11 has a more modern Settings menu, but the classic Sound Control Panel still exists and is often necessary for full control. The steps in this guide work for both operating systems. The main difference in Windows 11 is greater emphasis on the “Volume mixer” in the System > Sound settings for per-app control, which can be very useful for overriding a game’s choice.
What if I want game audio on my speakers but chat in my headset?
This is the intentional use of the two-device system we explained. To set this up, go to the Sound Control Panel. Set your high-quality speakers as the “Default Device.” Then, set your headset as the “Default Communications Device.” In Discord or other chat apps, set the output device to your headset. Many games will follow the Default Device (speakers), while chat will use the Communications Device (headset). Be aware that some games might still latch onto the Communications Device, so you may need to adjust settings within each game.
Final Sound Check
Solving the puzzle of why is only my game audio coming out of my monitor requires understanding how Windows manages sound destinations. The problem is not a random bug but a logical result of specific settings. By following the diagnostic checklist, you systematically eliminate each possible cause, from physical connections to driver conflicts.
The most powerful step is the proactive setup. Taking ten minutes to correctly assign your default devices and disable unused ones builds a clean audio foundation. This prevents confusion for Windows, your games, and your communication apps. Remember that games have their own settings, so always check there if the problem is isolated to a single title.
You now have the knowledge to not only fix this issue today but to configure your system for perfect audio tomorrow. The frustration of sound coming from the wrong place is now a problem you can confidently solve.